How we save over $5000 on food

2012121110654.jpg

Are you tired like N-dog here, of constantly finding yourself stressed out while standing in the grocery store, not knowing what you`re going to have for dinner? Do you want to save more money on food?  Are you tired of eating industrial, un-healthy food? Then keep on reading!

So.. this is embarrassing, but a couple of years ago, when BF and I moved in together, we both lived in small spaced dorms and shared kitchen with a lot of random (and semi-crazy) people, so we didn`t like to spend much time in the common room, which means that we didn`t think about how much money we wasted on food. We went to expensive grocery stores because it was more convenient, we bought easy expensive industrial food,  and shopped every day. Neither of us thought about how much we were really spending.

But then we moved into a house together and I started paying attention to what I ate due to my Fibromyalgia. That was 3 years ago, and I`ve had a steep learning curve and saved so much money! Approximately $5300 a year! That`s A LOT of money. We used to spend more about $900(!!) on food a month. I know, I know, but I did warn you, it was not my finest hour. …Continue reading

Where are you Spring? & Sunday Link

IMG_2141 wm

I didn´t have time to post anything yesterday, which is why Sunday Link is filling in for Saturday Link today:-)  Yesterday I spent the entire day in the woods by a bonfire, grilling hot dogs and drinking some wine (so classy) with a bunch of people, which eventually turned into an After-Bonfire when the sun had set… I´m a bit tired today, but I had such a great time yesterday and met loads of nice people. This week was my Easter Break, but I did manage to write almost 4 pages on my Bachelor Thesis before taking some time off studying. I wrote about how I called of my Gym membership, shared a delicious Lemon and Chocolate Cupcake recipe with you and about typical Norwegian Easter Traditions.  Spring still seems so far away, and I`m already dreaming of summer, hence the picture! How will this end? …continue reading

Easterlicious Lemon & Chocolate Cupcakes

IMG_3964 wm

Easter is right around the corner, so I thought I´d share this easterlicious lemon buttercream cupcake recipe with you. If you remember the Double Trouble Chocolate Cupcakes, you`ll see that it´s the same basic recipe, only this time I`ve made it with a fresh, citrus frosting based on lemon curd. In Norway, yellow is the traditional colour of Easter, signifying brighter times are coming after a long winter. That`s why I found it suitable to make these delicious cupcakes into an Easter treat! …continue reading

Dreamy Raspberry Mousse & Hazelnut Cake

IMG_3993 wm

This is both BF and my favourite cake, it`s something I always make for birthdays. I`ve served this in many occasions, and people always take an extra slice of cake! It has an incredibly fresh, sweet taste of raspberries combined with the nuttiness from the hazelnut cake which creates the perfect combination. It does require some time and effort, so I recommend making it over two days. But the great thing with this cake is that you can freeze the leftovers. That is, if there`s anything left to freeze! I thought I`d share this recipe with all of you now, in case you want to make something delicious during Easter! …continue reading

Whole Wheat Sourdough Starter

IMG_3996 wm

There`s usually two types of sourdough starters, either wheat or rye. I prefer baking with different kinds of wheat, so this recipe will cover a whole wheat sourdough starter.

Step One: Day 1

1/4 cup whole wheat flour
3/4 cup flour
1 cup water
1 tsp. salt

Mix the ingredients in a bowl (either plastic or ceramic: NO metal!) and cover with a lid,making sure that it`s air tight! Keep in room temperature. Do NOT put it in the fridge!

Step Two: Day 2, 3 & 4

Add the following ingredients each day and mix well:

1/4 cup whole wheat flour
1/4 cup flour
1/2 cup water

Sidenote: on day 4, the starter should have bubbles, if not you have to start all over again!

Step Three: Day 5, 6, 7 & 8

On day 5, take out 1/2 of the sourdough starter, and add 1 cup flour and 1/2 cup water. Do this in the morning. By night you should take out 1/4 of the starter, and yet again add 1 cup flour and 1/2 cup water. On day 6, 7 & 8, add 1 cup flour and 1/2 cup water, twice a day (approx. 12 hours apart)

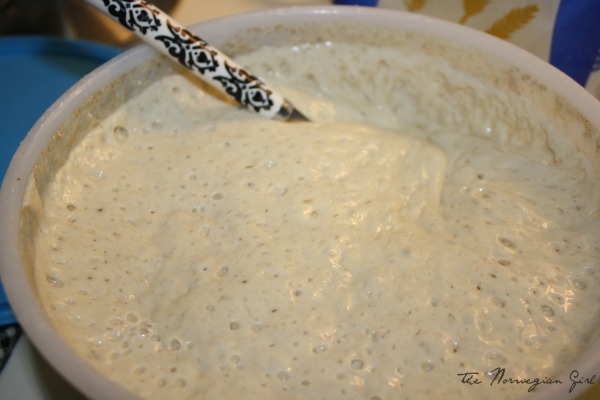
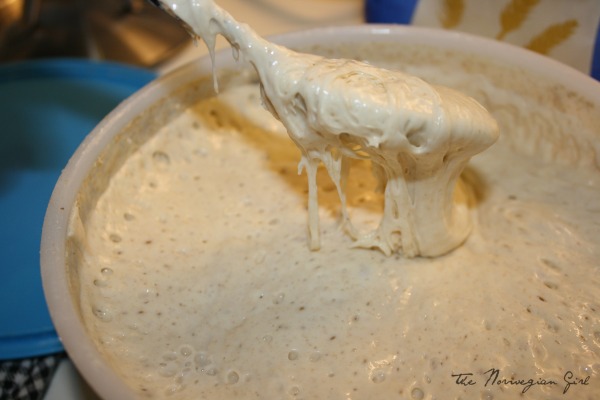
During these days the starter should be getting smellier and smellier, i.e the sour smell 😉  and having more and more bubbles. On the last day it should have raised after being fed flour and water. If what you`ve got now is a thick, sticky, smelly and bubbly dough it`s all finished. it should look something like this

IMG_3997 wm

Now you can start baking with the sourdough starter, and since it´s all finished you can keep it in the fridge, but remember to feed it once a week to keep it alive! If you feed it about 1/2 cup flour, and 1/4 cup water a week it`ll keep staying alive, making sure that all that work wasn`t wasted! Sidenote: If you feed it more flour and less water it`ll get real thick, but it`ll also last a lot longer!

Now run along and start making this starter! Please be patient, it does aquire some time, but once you´ve made it, it can last for a really long time, and you don`t have to buy any more yeast! 😉

And when you`ve made the starter you`ll be able to make something like this homemade sourdough bread; IMG_4017 wm

Follow on Bloglovin