Double Trouble Chocolate Cupcakes

double trouble chocolate cupcake

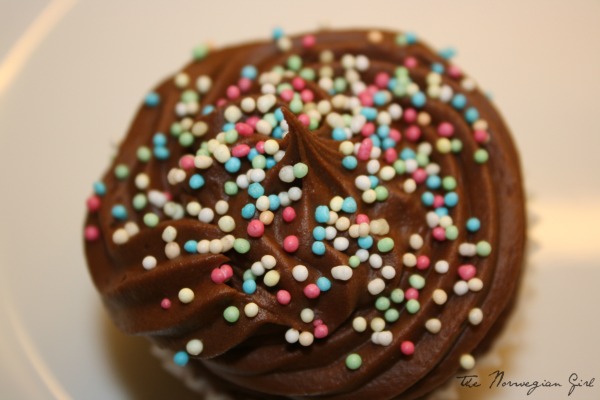
Today is my BF`s 26th birthday, and at his job it`s common to bring something sweet to work on their birthdays. So yesterday was filled up with cupcakes all over the place. I made like three batches of cupcakes and I also started on a Raspberry mousse cake that`ll be the birthday cake here at home. One of the cupcake recipes I made was this super delicious Double Trouble Chocolate Cupcakes. They contain chocolate in both the batter and the frosting. It`s such a treat, so I hope the people at BF`s work enjoy them!

Double Trouble Chocolate Cupcakes

Ingredients
1.5 stick of butter (room temperature)
1 ¼ cup of sugar
3 eggs
3.5 oz. dark chocolate
4-5 tbsp. sour cream/yoghurt
2 cups of flour
8 oz. water (boiling)
2 tsp. baking powder
2 tbsp. cocoa

Instructions
Turn the oven on 390 F.
In a small bowl, add chocolate and cocoa. Heat up water and pour it over. Stir well, and make sure all of the chocolate is melted. Let cool off. Mix sugar and butter until it gets light and fluffy. Add one egg at a time. Add flour and baking powder. Mix gently. Now add the chocolate mixture and the sour cream /yoghurt. Mix gently.
Fill the cupcake tin about 2/3 in each. Bake in the oven for 13 minutes.

Chocolate Buttercream Frosting
2 sticks of butter
2 cups of confectionary sugar
7.5 oz chocolate
4-5 tbsp. milk

Mix room temperature butter and the confectionary sugar until it gets really light and fluffy. Add the milk. Mix well. Add melted chocolate and mix well. And ta da! Now it`s done! Now the fun stuff begins. Bring out the sprinkles, and start decorating! I love using colourful sprinkles!

IMG_3961 wm

Marble Cake – Reviving a Childhood Classic

IMG_3613

When I was a child, this is a cake that my mom and I used to make together, but I hadn`t made it in about 10 years, until last week when I was visiting my parents. I was feeling bored, and when I`m bored, I bake! I had been thinking about marble cake everynow and then, and considering I was at my parent`s place, it would be a fun thing to make; reminiscing about the good old days.

Sidenote: in Norwegian, marble cake is called “marmor kake” (yeah, cake is kake), but what`s funny is that I used to call it “mormor”, which means grandmother on the mother`s side. (mormor = mother-mother). A mistake my mother rarely corrected me on, as she thought it sweet that I called the cake after my grandma:-)

One of the best things about this cake, is the unique pattern that is created. Especially for a little child, it was always so exiciting when it was time to slice the cake into bread-like pieces, and look at the shapes. Like in this one, it kind of reminds me of a cartoon whale.

Anyway, here`s the recipe, and I hope that you all have a great weekend!

1.5 stick of butter  (175g)

1 cup sugar

1/3 cup milk

3 eggs

1 2/3 cup flour

1 ½ tsp. baking powder

3 tsp. vanilla sugar

———————

3 tbsp. cocoa

1 tsp. vanilla sugar

3 tbsp. milk

——————

Preheat the oven to 350° F.

Prepare a bread pan. Mix butter and sugar well. Add done egg at a time. Add milk and flour with the baking powder and vanilla sugar. Take out half the batter and pour it in the bread pan. Add cocoa, vanilla sugar and milk to the half that`s left in the bowl. Mix well and pour the dark batter over the white batter. Take a fork into the batter and makes swirls so the light and dark batter gets swirled into each other.

Bake in the oven for 45-50 min.
Let cool off, then slice into bread-like pieces and enjoy!

Budget friendly treat; Chocolate covered Walnuts with sea salt

ImageThe other day I had some leftover melted chocolate from making Homemade Bounty bars; and thought it would be a shame to throw it out. I took a good look into my cupboards and that`s when I found a container with walnuts. Enter idea. Why not mix the walnut with the chocolate and then sprinkle some sea salt? It turned out amazing! the texture of the walnut combined with the sweet chocolate, and the addition of sea salt. Oh my, that`s good! It`s the easiest thing to do; it really is a frugal, budget-friendly treat. And to make things even better. I could use the tin container the walnut was originally in, to keep the treats. I`ll actually be taking these with me tomorrow, when I`m leaving the country. With the tin container having a plastic lid, it`ll be easy to handle and they won`t get damaged in my cabin luggage.

Ingredients:

  • Chocolate
  • Walnuts
  • Coarse Sea salt

Instructions:

Melt chocolate/or use already melted, mix with walnuts, spread it out on a tray or a pan. sprinkle sea salt. put it in the fridge for a couple of hours. Then break it up in suitable pieces. Voila! bon appetit!

ImageImageand if you`re wondering, yes, “valnøtter” is Norwegian for walnuts!

Heavenly Homemade Bounty bars

ImageImage

These tasty Bounty bars are a lot healthier than the store-bought bounty; by the fact that its homemade, there is no unnecessary additives such as salt, glucose syrup, glycerol, emulsifiers, nor whey powder in it, as there are in store-bought bounty, and a lot less sugar. By using dark chocolate, it gets a very rich flavor and combined with pure ingredients; you won’t be able to eat more than a couple of bites. So you won’t eat as much, and it’s a much better alternative than store-bought. I made these yesterday, and I have to be honest with you. It was the best bounty bar I have ever tasted!

Ingredients

50 g /1.7 oz coconut oil

3 oz demerara sugar (raw sugar)

3.4 oz whipping cream

3.4 oz light coconut milk

200 g / 7 oz dried shredded unsweetened coconut

200-400 g / 7-14 oz dark chocolate (depends on the size of the bar)

Instructions

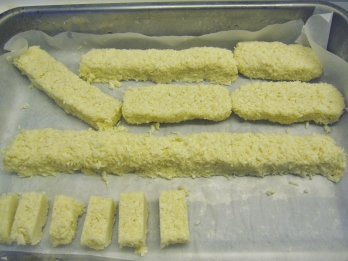
Heat the coconut oil on low heat. Add sugar and whipping cream. Let the sugar melt. Then add coconut milk and the dried coconut.  Mix well. Put it in the fridge or freezer to cool off until it got a firm texture. Image

This is when it gets messy. Use a tablespoon and take big portions in your palms and squish it tightly. Try to shape it into long bars. When you`re done, put it into the freezer over night.

Image

Next day: use a sharp chopping knife and cut the big bars into smaller pieces. Put back into the freezer. Melt chocolate and get everything ready.

ImageTake the coconut pieces out of the freezer and dip one by one into the melted chocolate. Since the coconut is frozen, the chocolate will cool off quickly. When you`re done, put them into the fridge for a couple of hours. Enjoy!

ImageNote: depending on how big the sizes are, how much chocolate you need vary. I wanted small portion sizes so I used more chocolate. If you want bigger bars, then you won`t need as much to cover the bites.

Question: I`m used to the metric scale, so I use dl and grams mostly, but I try the best I can to convert the ingredients into other units of measurement. However, I`m not sure when to use oz and when to use cups, because sometimes it seems a bit unprecise to use cups when the ingredient measures requires more precision. When should I use the different measurement units?

Productive days in the Kitchen

It was quiet in here yesterday, because I was busy in the kitchen, baking two different kinds of portion bread and then making bounty bars. When it was all done I was a bit tired, and realized I hadn`t eaten anything since breakfast. I know, it`s not good for me. It`s just that when I get into baking-mood, I entirely forget to eat. So after being a busybee in the kitchen for 6 hours, and finally having got some dinner, I collapsed on the couch and stayed there all night.

I`ve also been quite busy in the kitchen today as well, I made caramels, for the first time ever, sprinkled with sea salt (!!!) and wheat tortillas. But all this means for you is that I now have 5 new recipes to share with you;

Homemade Bounty BarsBounty Bar

Crescent RollsImage

Triangle Bread with Pumpkin seedsImage

Wheat TortillaImage

Caramel with Sea SaltIMG_3510